Ryedale Woodturners

Colwin Way
Thursday 2 February 2023
Snainton Village Hall
There are no detail photos for this write-up, as it was a virtual demonstration. Hopefully I may be able to use some stills from the video once it is available. Colwin also answered a few questions I had sent him in advance.
Some questions and answers
What is the best size to cut green wood for storage? Should it be left as logs, or should it be cut lengthways as soon as possible?
Best left in lengths as long as possible. 4 or 5 foot is ideal. Cutting lengthways is good, into half logs, to remove the pith.
Should it be cut to square or bowl blanks, or left in log form or half-log form?
Cut into blanks only to remove the pith from any pieces
Should we apply End Seal or similar straight away, or after it has dried a little?
Apply End seal, or paint, or PVA, as soon as possible.
Any advice on mould?
Mould tends to be a problem with white wood - ash, sycamore, maple, rhododendron! Not really a problem with timber such as oak or chestnut. The best way to prevent it is to keep timber in a dry area where air can circulate. Don't stack pieces together - separate with spacers.
Have you ever tried microwaving smaller pieces to dry them out?
Yes. It can take quite a few blasts, say 30 seconds at a time, low setting. It can leave a strong odour behind - if you are using the kitchen microwave be prepared for tainted food.
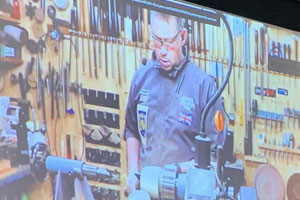
The pot was reversed using a jam chuck, turned from a piece of scrap tulipwood to fit inside the bowl. A piece of paper roll was shoved inside the bowl (avoid kitchen roll with patterns on!), and the piece was held against this chuck with a ring centre in the tailstock,.the spigot was turned away until just a small nib remained. This was then cut away with a Japanese flat saw and sanded off.
Colwin pointed out the sap spinning out of the wood, and covering himself, his tools and his lathe. Because this was oak, it has a high tannin content and the sap is highly corrosive. Hence the need to wipe clean all surfaces and tools. He uses camellia oil on his tools to keep them clean.
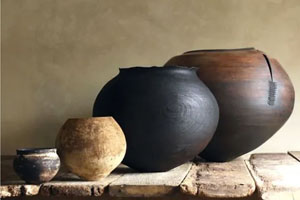
Often the "flaws" in natural timber can be exploited to good effect. Cracks, knots, inclusions, voids, bark - all can be made a feature of, and probably increase the selling price of the piece. Colwin mentioned some expert proponents of this practice - Ash and Plumb. These are designers Barnaby Ash and Dru Plumb, working in Sussex. Their website Ash & Plumb is well worth a visit with its gallery of beautiful "imperfect" pots that are really quite perfect. I love the stitching on the cracks.
The second piece was a piece of ash which had been rough-turned when wet, and left to dry for a few months. It was now turned to a finish. Again a simple shape, a sort of Japanese pot, with the markings in the timber doing the selling for the piece rather than any ornamentation. Sanded by hand again, then some finishing oil was applied, bringing out the colouring in the grain. Usually Colwin would apply three coats of oil, with 24 hours between each coat.
The previous jam-chuck was re-shaped for this pot. It was important the base of the pot rested on the top of the jam chuck. There was some squealing from friction between the jam chuck and the pot, which suggested to Colwin that the headstock and tailstock were not quite centred, but adjustment didn't remove the squeal and he had to finish the piece accepting the unpleasant noise.