Ryedale Woodturners Club Demonstration
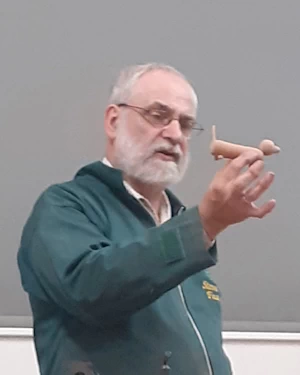
Steve Fearnley
Thursday 2 October 2025
Snainton Village Hall
Steve Fearnley returned in demonstration mode after a two-year gap, to show how to make more ornaments for sale, particularly with Christmas in mind.
Turning items to sell
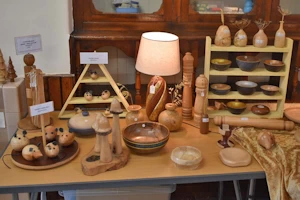
Steve started with a brief word about items that sell well, and those that don't, plus a look at how to make sale displays more attractive and less demanding on space.Thanks to Geoff Walker for bringing along some of his woodturning and display ideas.
Sausage dog
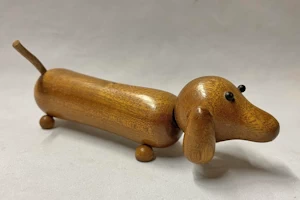
A square iroko spindle bank roughly 40 x 40 x 150 mm was placed in Versalock jaws. With the tailstock engaged, a pear-shaped head was turned at the end, and sanded. Only after this was the tailstock removed so the nose could be finished. Then the head was parted off and tidied up. Steve used a fine marking knife for the final parting cut, to minimise the chance of any damage to the rear of the head. A swept back half-inch spindle gouge was used (a Henry Taylor Diamic, Steve's favourite tool.)
The remainder of the blank was then turned into a sausage, with a slight curve narrowing in the centre of the body. Achieved by turning "downhill" from each end, meeting in the middle. Rounded off at both ends, the head and body were then drilled with a 6mm brad-point drillbit, and a dowel peg used to join the two pieces together. Some thought about the angle and position of the drilled holes is worthwhile - it will vary the dog's expression.

The ears were turned as a pair using a glue joint technique. Often done using paper sandwiched between two blocks of wood and PVA glue, two equally sized pieces are glued together to form a blank, then the required shape can be turned before breaking the pieces apart again. The blank formed by the two pieces needs t be square section, with the centre on the line of the join. Because PVA glue takes some time to dry, Steve used double sided tape with the same results, though this does require scraping off with a knife and can be a little sticky. Once the adhesive is removed, lightly sand the flat side.
Flat areas need to be created on the head to allow the ears to fix on. About 1 cm diameter. Achieved by a light touch on a disc sander - not too much. Ears will be fixed on with CA glue and accelerator, but not before everything is polished to a finish.

Eyes are turned from a thin piece of African blackwood - about 5 or 6 mm square cross section. Held in bullnose jaws that can close down to zero. Turned down to 4 mm diameter for the eye with a sharp parting tool, then 3 mm for a peg to fix them into holes, about 1 cm long. Measurements can be achieved using small spanners of the correct diameter - rest on the wood while turning (once turned to round, not when square) until they "drop". The same technique is used for four feet - 10 mm diameter spheres on 4 mm pegs. It is very difficult to turn things this small exactly the same, so make a few at a time and line them up in a rack, then choose two eyes that look the same, and four legs.
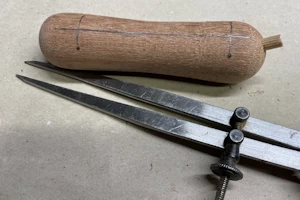
Take care in positioning the eyes and legs. Very slight misalignment of eyes can give a quizzical look (perhaps desirable?), and legs need to be as balanced as possible so the dogs stands without rocking. Steve drew a line down the centre of the underside of the sausage, then measured, using dividers, 1 cm either side for four 4 mm holes. Same for the tail - ensure alignment with the head, a 4 mm hole to take a piece of leather cord (available in reels). An alternative would be to turn a tail, but Steve likes the slight curve created by using leather cord.

Everything should be sealed and polished before gluing together, apart from the eyes, which are easier to hold if they are in their sockets. Steve applied cellulose sealer, and then buffed the parts with a 3-mop buffing system using Tripoli (abrasive wax compound), then White Diamond (slightly abrasive), and finally carnauba wax. Chestnut make the 3-mop systems.
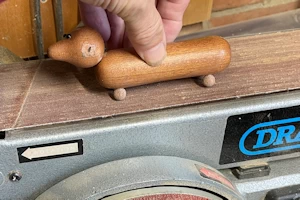
With the feet in place, the dog can be balanced by standing him on a belt sander, creating four pads on his feet. A light touch should be sufficient to make him stable. Everything can then be glued together - CA glue is acceptable in this case - be careful not to do as Steve did and glue your finger to the head when fixing the ears! Some debonder is always useful to have on hand.
Robin ornament

Steve described and part-made a robin using similar techniques to the dog. Turned from obeche, a very light wood (i.e. low density) which he had acquired as "short ends" - offcuts from larger planks - courtest of Martyn. The body is essentially a sphere with a small bump on it. Parted off leaving a 15 mm flat base for the robin to stand on.
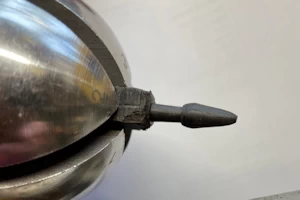
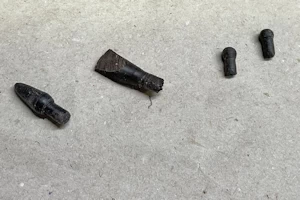
Eyes were turned as before, and a conical beak can be turned from a piece of blackwood, again with a 4 mm peg on it. Not too long for the beak - experiment to see what looks right, but about 12 mm long seems enough. The tail is turned as an inverted cone, then flattened using the disc sander. Again with a 4 mm peg on it. Leaving the tail on the spindle while flattening it helps with holding - or it can be flattened with a sanding disc in a drill whilst still on the lathe.
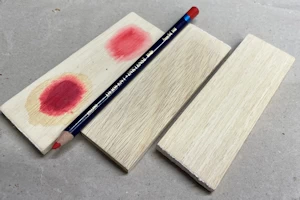
The red breast can be achieved either using stain, paint or watercolour crayons, which offer more control. Steve suggested experimenting on offcuts of the same wood to achieve the best effect. With a pencil, scribble roughly, then blend in with a small damp paintbrush. Leave to dry well before sealing with cellulose sanding sealer. As with the dog, polish the body (with eyes in place) with the buffing system or apply any other preferred finish, then glue in the beak and tail.
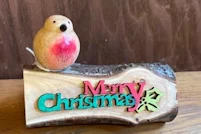
The robin can have a hook eye screwed into his head to allow hanging on a tree, or can be left free standing. He can be placed on a branch for extra effect - create a flat using the belt sander for the log to stand on, and another flat at an angle to apply a Merry Christmas stencil, available online, possibly advertised as a cake decoration. The robin can be fixed on to the log using a dowel peg, as with the head and body on the dog.
Reindeer
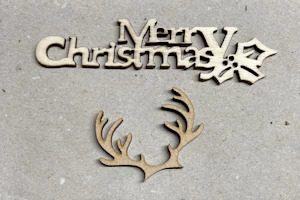
The obeche blank Steve had turned the robin from had a little length left over, not enough for another robin, but enough to make a reindeer decoration. A similar sequence of steps. Turn the head to a reindeer shape - wider at the bottom than the top. The top needs to have a curve that matches some laser-cut reindeer horns that were acquired online (along with lots of other Christmas shapes).

Two eyes were turned as before, and the nose is a slight variation on the dog's feet. It looks best if it is a hemisphere, resting flat on the reindeer's head (again use a light touch on the disc sander to create a flat). A little red stain was applied to the nose in tribute to Rudolph.
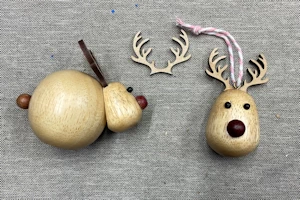
The reindeer head can have an eye hook screwed in to use as a tree decoration. Or a body can be turned as a sphere. A flat is created on the body and on the rear of the head at suitable angles. These can then be drilled and a dowel peg used to fix the two together. Accelarator and CA glue can be used to fix the horns. Steve found it best to fix the horns before polishing, and then polish on the buffing wheel with some care not to catch the horns. An easier solution might be just to finish with acrylic spray lacquer.
A video of the demonstration is available on YouTube.